1. 커스텀위젯
커스텀 위젯을 사용하는 방법은 class를 이용하는 방법이다.
커스텀 위젯은 state 관리가 힘들어 질 수도 있다.
재사용이 많은 UI와 클 페이지들 커스텀 위젯으로 만들어두면 좋다.
1) stless치고 클래스 명 생성 후 원하는 코드 작성
class MyApp extends StatelessWidget {
  const MyApp({Key? key}) : super(key: key);

  @override
  Widget build(BuildContext context) {

    return MaterialApp(
      home: Scaffold(
        appBar: AppBar(
          backgroundColor: Colors.white,
          actions:[
            Icon(Icons.search, color: Colors.black,),SizedBox(width: 10),
            Icon(Icons.menu, color: Colors.black),SizedBox(width: 10),
            Icon(Icons.notifications_outlined, color: Colors.black), SizedBox(width: 10),],
          title: Row(
            children: [
              Text('금호동 3가', style: TextStyle(color: Colors.black, fontWeight: FontWeight.bold),),
              Icon(Icons.expand_more, color: Colors.black,)
            ],
          )
          ),
        body: ShopItem()
      )
    );
  }
}

//나만의 위젯을 만드는 법
class ShopItem extends StatelessWidget {
  const ShopItem({Key? key}) : super(key: key);

  @override
  Widget build(BuildContext context) {
    return SizedBox(
      child: Text('안녕'),
    );
  }
}
2) 변수로 설정
모든 class 밖에서 변수 설정해서 위젯 생성
* 이 케이스는 성능상 이슈가 있을 수 있음
- 담아도 되는 변수 : 평생 안바뀌는 로고, 상단바, 하단바
**실시간으로 바뀌는 것들은 class로 하기!!
var a = SizedBox(
  child: Text("변수로 커스텀 위젯 생성 "),
);

class MyApp extends StatelessWidget {
  const MyApp({Key? key}) : super(key: key);

  @override
  Widget build(BuildContext context) {

    return MaterialApp(
      home: Scaffold(
        appBar: AppBar(
          backgroundColor: Colors.white,
          actions:[
            Icon(Icons.search, color: Colors.black,),SizedBox(width: 10),
            Icon(Icons.menu, color: Colors.black),SizedBox(width: 10),
            Icon(Icons.notifications_outlined, color: Colors.black), SizedBox(width: 10),],
          title: Row(
            children: [
              Text('금호동 3가', style: TextStyle(color: Colors.black, fontWeight: FontWeight.bold),),
              Icon(Icons.expand_more, color: Colors.black,)
            ],
          )
          ),
        body: a
      )
    );
  }
}
2. ListView
ListView( children:[]) 자동으로 아래로 줄바뀌면서 스크롤바 생기는 위젯
controller : 를 통해서 스크롤 위치 감시도 가능
메모리 절약도 가능함. 성능개선!
쇼핑몰 앱, 인스타 피드 다 리스트
body: ListView(
  children: [
    Text('안녕'),
    Text('안녕'),
    Text('안녕'),
    Text('안녕'),
    Text('안녕'),
  ]
)
2-1) ListTile
body: ListView(
  children: [
   ListTile(
       leading : Icon(Icons.account_circle),
       title:Text('홍길동')
   )
  ],
),
2-2) 목록이 100개 있어야한다면? ListView.builder()
붙여넣기를 다 할 수 없다. 컴퓨터의 도움을 받아야한다.
그때 ListView.builder가 for 대신에 반복문을 수행해준다.
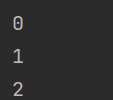
body: ListView.builder(
   itemCount: 3,
   itemBuilder: (context,i){ //일반적으로 c,i로 작명
     return Text(i.toString()); //이 위젯이 3번 반복됨
   }
  ),
itemCount: 반복횟수
itemBuilder: (c, i ) { return 반복할 것); }
ListTile(
		leading: FlutterLogo(size: 72.0),
		title: Text('Three-line ListTile'),
		subtitle:
			Text('A sufficiently long subtitle warrants three lines.'),
		trailing: Icon(Icons.more_vert),
		isThreeLine: true,
	),
3. 콘솔에 print 하는 법
body: ListView.builder(
   itemCount: 3,
   itemBuilder: (context,i){ //일반적으로 c,i로 작명
     print(i);
     return ListTile(
       leading: Icon(Icons.account_circle),
       title:Text('홍길동')
     ); //이 위젯이 3번 반복됨
   }
  ),
'flutter' 카테고리의 다른 글
| [Flutter] Dialog (0) | 2024.03.18 |
|---|---|
| [Flutter] 버튼에 기능 추가(FAB, State) (3) | 2024.03.18 |
| [Flutter] Box 그리기, Typography와 Button Layout 만들기 (0) | 2024.03.11 |
| [Flutter] 가로세로 배치 (0) | 2024.03.11 |
| [Flutter] 기본 위젯 4개(Text, Icon, Image, Box widget) (0) | 2024.03.09 |